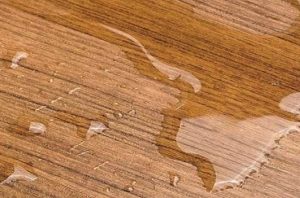
Knowing how to repair damaged flooring can help you restore the appearance of your home, prevent further deterioration and avoid replacing an entire floor unnecessarily. Scratches, chips, loose tiles, lifted vinyl, swollen laminate and damaged floorboards are common problems, but the right repair depends on the material and the cause of the damage.
Some issues, such as minor surface scratches, can be repaired with basic tools and suitable products. Others, including water damage, extensive cracking or a soft subfloor, may require professional attention.
Before starting any repair, identify the flooring type, assess the extent of the damage and check whether moisture or movement is responsible. Repairing the visible problem without addressing its cause can lead to further damage.
This guide explains how to repair different types of flooring, which tools you may need, when to call a professional and how to prevent similar problems in the future.
How to repair damaged flooring: start by identifying the problem
The first step is to determine what has caused the damage. Different flooring materials respond differently to moisture, pressure, impact and everyday wear.
For example, a scratch on laminate flooring requires a different treatment from a cracked ceramic tile. Similarly, a lifted vinyl plank may indicate an adhesive problem, an uneven subfloor or moisture beneath the surface.
Start by examining the damaged area carefully.
Look for:
-
Scratches, scuffs or worn finishes.
-
Cracks, chips or broken sections.
-
Loose tiles or floorboards.
-
Raised edges, gaps or lifting planks.
-
Swelling, discolouration or staining.
-
Soft spots, movement or unusual sounds underfoot.
-
Signs of leaks, dampness or mould.
Check whether the damage is limited to one small area or affects several parts of the room. If multiple boards are swelling or several tiles are cracking, the problem may involve the subfloor, moisture or building movement rather than the flooring alone.
Before carrying out repairs, move furniture away from the affected area and clean the surface using a method suitable for the material. Avoid soaking the floor, particularly if it is laminate, timber or another moisture-sensitive product.
If the floor is wet because of an active leak, deal with the water source first. Do not cover damp flooring with a repair compound or install replacement boards until the underlying problem has been resolved.
Tools and materials you may need
The tools required depend on the repair. Minor surface damage may need only a cleaning cloth and a suitable repair product, while replacing a tile or floorboard can require more equipment.
Common tools and materials include:
-
A vacuum cleaner or soft brush.
-
A clean cloth and suitable floor cleaner.
-
A tape measure and pencil.
-
A utility knife for suitable flooring materials.
-
A putty knife or small scraper.
-
Flooring repair wax, filler or a colour-matched repair kit.
-
Replacement planks, boards or tiles.
-
Adhesive recommended by the flooring manufacturer.
-
A suitable grout or sealant.
-
Protective gloves and eye protection where appropriate.
For more involved repairs, additional tools may be necessary. However, do not buy specialist equipment until you understand the type and extent of the damage.
Always follow product instructions, provide adequate ventilation and wear suitable protective equipment. Before cutting, scraping or removing flooring, check for hidden pipes, cables and other services.
If the floor may contain asbestos because of its age or construction, do not sand, drill, scrape or remove the material yourself. Arrange an appropriate assessment before disturbing it.
How to repair scratched laminate flooring
Laminate flooring has a decorative surface protected by a wear layer. Minor marks may affect only the surface, while deeper scratches can expose the printed design or the core beneath it.
The repair method depends on the depth of the damage.
Repair minor scuffs and surface scratches
Start by cleaning the area with a soft cloth and a cleaner approved for laminate flooring.
Some marks are simply dirt or transferred material rather than scratches. If the mark disappears after cleaning, no further repair is necessary.
For a shallow scratch, use a laminate repair product that matches the floor’s colour. Follow the manufacturer’s instructions and test the product in an inconspicuous area first.
Avoid using abrasive pads, aggressive solvents or products designed for solid wood unless they are specifically approved for your laminate. These can damage the protective surface or leave a noticeable patch.
Repair deeper scratches and chips
Deeper damage may require a laminate repair wax, filler or colour-matching kit designed for the product.
Choose a repair material that is suitable for the exposed surface and follow the instructions carefully. Use only the amount required and remove excess material as directed.
If the decorative layer is badly damaged or the core is exposed, a surface repair may remain visible. In that situation, replacing the affected plank may provide a better result.
Many laminate floors use a click-lock system, but replacing a plank is not always straightforward. Depending on the installation, the floor may need to be partly dismantled from an edge or repaired using a method approved by the manufacturer.
Do not force the boards apart, as this can break the locking joints.
How to repair swollen or water-damaged laminate flooring
Swollen laminate flooring often develops after water enters through joints or remains on the surface for too long. The edges may rise, the boards may feel uneven or the surface may become distorted.
Unfortunately, swollen laminate usually cannot be restored fully by sanding or applying filler because the core material may have expanded.
If you notice swelling, take these steps:
-
Identify and stop the source of the water, such as a leak or spill.
-
Remove standing water safely.
-
Dry the room and improve ventilation.
-
Check the surrounding boards for further damage.
-
Arrange an assessment if moisture may have reached the subfloor.
Do not use intense direct heat to force the floor to dry. Rapid or uneven heating can cause further damage.
If the laminate remains swollen after drying, the affected boards may need replacing. The subfloor should also be checked for moisture and damage before new material is installed.
If the water came from a contaminated source, such as sewage, avoid handling affected materials yourself and seek appropriate professional assistance.
How to repair scratched wooden flooring
Wooden flooring can develop scratches from furniture, footwear, pets and everyday use. The correct repair depends on whether the floor is solid hardwood, engineered wood or a wood-effect product.
It is also important to distinguish between damage to the protective finish and damage to the timber itself.
Repair light scratches
For light surface marks, clean the area with a product suitable for the floor’s finish. Some marks may disappear after cleaning.
If the finish has been scratched, a compatible maintenance product or touch-up pen may help improve the appearance. Test it in a hidden area first because the repaired section may differ slightly in colour or sheen.
Avoid applying furniture polish, oil or wax unless the flooring manufacturer recommends it. Some products can leave residue or interfere with future refinishing.
Repair deeper scratches and dents
Deeper scratches may require a colour-matched wood filler, wax repair stick or specialist repair compound. Select a product designed for the specific finish and follow the manufacturer’s instructions.
For solid hardwood, sanding and refinishing may be possible if the damage extends across a larger area. However, this requires care because excessive sanding can reduce the board’s usable thickness.
Engineered wood has a real timber surface, but the thickness of that layer varies. Some products can be refinished, while others cannot tolerate significant sanding.
Check the product specifications before attempting a major repair. If the floor is valuable or the damage is extensive, a flooring specialist can advise whether local repair, refinishing or board replacement is most appropriate.
How to fix gaps between wooden floorboards
Small gaps can appear between timber boards as indoor humidity changes. Wood expands and contracts naturally, so some seasonal movement may be expected.
However, large or persistent gaps may indicate unsuitable moisture conditions, poor installation or movement in the floor structure.
Before filling gaps, establish why they have appeared.
-
Check for changes in room humidity.
-
Look for signs of water damage or dampness.
-
Inspect whether the boards move underfoot.
-
Consider whether the gaps appeared suddenly or gradually.
-
Check the manufacturer’s guidance for the flooring type.
Small gaps may be normal for certain solid wood floors. Filling them with a rigid material can cause problems if the boards expand later.
If the gaps are excessive, a flooring specialist can assess whether the boards need adjustment, replacement or another form of repair.
Do not fill large structural gaps with ordinary household sealant and assume the problem is solved. The correct treatment depends on the construction and movement of the floor.
How to repair cracked or chipped tiles
Ceramic and porcelain tiles can crack or chip after a heavy object falls on them, or when the underlying surface moves.
A small chip may be repairable with a suitable tile repair kit. A cracked tile may need replacing, particularly if the crack affects the whole tile or creates a sharp edge.
Repair a small chip
Clean the damaged area and allow it to dry. Use a repair compound designed for the tile material and select a colour that closely matches the existing surface.
Apply the compound according to the product instructions, then allow it to cure fully before cleaning or using the floor.
This approach may improve the appearance of a small chip, but it will not restore the original tile’s full strength.
Replace a cracked tile
Replacing a tile is more involved because the damaged tile must be removed without harming the surrounding tiles or the subfloor.
The general process involves:
-
Finding a matching replacement tile.
-
Removing the grout around the damaged tile.
-
Carefully removing the tile and old adhesive.
-
Inspecting the base for damage or movement.
-
Applying suitable adhesive and fitting the replacement.
-
Allowing the adhesive to cure before grouting.
-
Applying compatible grout and allowing it to cure as instructed.
If the tile is in a shower or another wet area, the waterproofing system must remain intact. Damaging a membrane beneath the tile can allow water to reach the structure.
A professional tiler may be the better option if the damaged tile is near plumbing, waterproofing or underfloor heating.
If several tiles crack repeatedly, investigate the underlying cause before replacing them. Movement in the subfloor or an installation problem may need to be corrected first.
How to repair loose or lifting vinyl flooring
Vinyl flooring may lift at the edges, develop bubbles or separate at the joints. These problems can result from adhesive failure, an uneven base, temperature changes, moisture or poor installation.
The repair depends on whether the flooring is sheet vinyl, adhesive-backed vinyl tile or click-lock luxury vinyl.
Fix a small lifted edge
For adhesive-backed flooring, check whether the product’s manufacturer permits local re-bonding.
If it does, carefully clean the affected area and use the recommended adhesive. Apply it as directed, then press the flooring into place using the method specified by the manufacturer.
Do not simply apply a random household glue. The wrong adhesive can damage the vinyl or prevent it from bonding properly.
For click-lock flooring, a lifted edge may indicate a broken joint, inadequate expansion space or an uneven subfloor. Pressing it down may not solve the underlying problem.
Repair bubbles in sheet vinyl
A bubble can form when air or adhesive becomes trapped beneath the surface. Small bubbles may sometimes be repaired using a method approved for the specific flooring product.
However, cutting or injecting adhesive beneath vinyl without knowing the product’s construction can make the damage worse.
If the floor is bubbling because moisture is trapped underneath, the source must be identified and resolved first. Otherwise, the problem may return.
Large bubbles, widespread lifting or repeated adhesive failure are best assessed by a flooring installer.
How to repair damaged carpet
Carpet can develop burns, pulls, stains, worn patches and torn edges. Some problems can be improved through cleaning or local repair, while badly damaged sections may need replacing.
For a small stain, use a cleaner suitable for the carpet fibre and follow the manufacturer’s instructions. Blot the affected area rather than rubbing aggressively, as rubbing can spread the stain or damage the pile.
If a small section is torn or permanently stained, a carpet patch may be possible. A matching piece can sometimes be taken from an offcut or a concealed area, provided the carpet construction and pile direction are compatible.
The repair usually involves cutting out the damaged section neatly and securing the replacement using an appropriate method. The seams must be aligned carefully to make the patch less noticeable.
Carpet repairs can be difficult to disguise if the replacement piece has faded differently or the pile runs in another direction.
Loose carpet edges and ripples may require re-stretching or refitting rather than patching. These problems should be corrected promptly to reduce the risk of trips and further damage.
If the underlay is wet or the carpet has been affected by contaminated water, the carpet and underlay may need specialist assessment or replacement.
How to repair scratches and cracks in concrete flooring
Concrete floors can develop surface scratches, chips, cracks or areas where the finish has worn away.
The appropriate repair depends on whether the damage affects only the surface or indicates movement in the slab.
Minor surface imperfections may be repairable with a suitable concrete patching compound or resurfacing product. The surface usually needs to be cleaned and prepared according to the manufacturer’s instructions.
Before filling a crack, assess its width, location and whether it is changing over time.
Hairline cracks may be cosmetic, but wide, growing or uneven cracks can indicate a more serious problem. Cracks accompanied by movement, water ingress or significant changes in floor level should be assessed by a suitable building professional.
Do not cover a damp concrete floor with a new finish without checking moisture levels and product compatibility. Excess moisture can affect adhesives and some flooring materials.
If the concrete forms part of the building’s structural floor, seek professional advice before carrying out repairs that involve removing material or altering the slab.
When should you call a flooring professional?
DIY repairs are suitable for some minor problems, but not every damaged floor should be repaired without professional help.
Consider hiring a qualified installer or relevant specialist if:
-
Several boards or tiles are damaged.
-
The floor feels soft, unstable or unusually springy.
-
There is persistent dampness or unexplained swelling.
-
Tiles continue cracking after replacement.
-
Water has entered the subfloor or building structure.
-
The repair involves a shower waterproofing system.
-
The flooring contains suspected asbestos.
-
The floor is above underfloor heating and cutting or drilling may be necessary.
-
The damage may involve structural movement.
A professional can help identify the cause, recommend a suitable repair and explain whether replacement is more practical than continued patching.
It is also worth checking whether the flooring is covered by a manufacturer’s warranty, installer guarantee or home insurance policy before starting work. Taking photographs and keeping purchase records may help when discussing a claim.
How much does flooring repair cost?
The cost of repairing damaged flooring depends on the material, the extent of the damage and the work required to correct it.
A minor surface repair may require only a suitable repair product, while replacing tiles, repairing a subfloor or addressing water damage can involve more labour and materials.
Costs can vary by location, materials, labour, property size and project requirements. The accessibility of the damaged area, the availability of matching flooring and the need to move furniture can also affect the final price.
When requesting a quotation, ask whether it includes:
-
Inspection and diagnosis.
-
Removal of damaged flooring.
-
Replacement materials.
-
Adhesive, grout, filler or other repair products.
-
Subfloor preparation.
-
Waterproofing or moisture treatment where necessary.
-
Waste removal and finishing work.
For example, replacing one cracked tile may be relatively straightforward if you have a matching spare and the base is sound. If several tiles are cracking because the subfloor is moving, the repair may be considerably more involved.
Compare the cost of a proper repair with the cost of replacing a larger section. The cheapest immediate fix may not offer the best value if the same problem returns.
How to prevent flooring damage in the future
Good maintenance can help extend the life of flooring and reduce the need for repairs.
The most useful preventive measures depend on the material, but several habits are helpful across many flooring types.
-
Clean spills promptly, especially on timber, laminate and other moisture-sensitive floors.
-
Use furniture pads to reduce scratches and dents.
-
Lift heavy furniture instead of dragging it across the floor.
-
Use suitable mats near entrances to reduce the amount of grit carried indoors.
-
Follow the manufacturer’s cleaning instructions.
-
Avoid excessive water when mopping floors that are not designed for wet cleaning.
-
Check for leaking appliances, plumbing and damaged sealant.
-
Maintain suitable indoor humidity for timber flooring.
-
Repair loose edges, grout and damaged joints before the problem spreads.
-
Use protective coverings when carrying out decorating or renovation work.
Regularly inspect areas around sinks, washing machines, baths and external doors, where water exposure may be more likely.
For timber and laminate floors, avoid unsuitable steam cleaners unless the manufacturer explicitly approves them. Excess heat and moisture can damage some products.
Prevention does not eliminate every risk, but it can help you identify small problems before they become more expensive repairs.
Frequently asked questions
Can damaged flooring be repaired without replacing the whole floor?
Yes. Minor scratches, small chips, localised stains and some loose sections can often be repaired individually. The best approach depends on the material, the extent of the damage and whether replacement pieces are available. Extensive water damage or widespread deterioration may require replacing a larger area.
Can swollen laminate flooring be repaired?
Swollen laminate generally cannot be restored fully because the core may have expanded. Stop the source of moisture, dry the area and assess the damage. If the boards remain distorted, they may need replacing. Check the subfloor before fitting new material.
Is it possible to repair a cracked floor tile?
A small chip may be improved with a suitable repair kit, but a cracked tile often needs replacing. Before fitting a new tile, check the adhesive base and surrounding area for movement or moisture. In wet areas, take care not to damage the waterproofing system.
What should I do if my flooring gets wet?
Remove standing water safely and stop the source of the leak. Dry the area using suitable ventilation and seek professional advice if water has reached the subfloor, insulation or building structure. If the water is contaminated, avoid handling affected materials without appropriate guidance.
Is it cheaper to repair flooring or replace it?
A local repair is often less expensive when the damage is limited and the rest of the floor is in good condition. Replacement may be more sensible when damage is widespread, matching materials are unavailable or the underlying cause cannot be resolved through a small repair. Compare the full costs before deciding.
How can I match replacement flooring to the existing floor?
Check the original product name, colour code, batch information and manufacturer where possible. Keep spare boards, tiles or carpet offcuts from the original installation. If the product is discontinued, a flooring specialist may help find a close match, although differences in colour and wear may remain visible.
Conclusion
Learning how to repair damaged flooring starts with identifying the material, understanding the cause of the damage and choosing a repair method suited to the problem. Minor scratches, small chips and some loose sections can often be addressed without replacing the entire floor.
However, swollen boards, recurring cracks, persistent moisture and unstable surfaces may indicate deeper problems that need professional attention. Repairing the visible damage without fixing its cause can lead to further expense.
Before starting work, check the manufacturer’s instructions, use suitable materials and assess whether the repair is safe to carry out yourself. Compare repair and replacement costs, and investigate warranties or insurance cover where relevant.
With careful assessment, appropriate repairs and regular maintenance, you can keep your flooring in better condition and avoid unnecessary replacement.